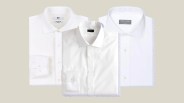
I have an extensive career in retail. The retail floor is where I cut my teeth, doing countless fit-and-feels, brushing up on reams of product knowledge and styling clients from head to toe. I oscillated between big-box department stores and boutiques, learning the ins and outs of the business. Among the many lessons I learned, and there are many, the one which I’m most grateful for is also one of the most mundane: How to fold a shirt.
Read More

It’s no argument that knowing how to count a till, order supplies or just treat people (customer service) are more useful. Maybe it’s a pet peeve of mine after years of conditioning myself to straighten and finger space. Or perhaps I find it therapeutic — but, it’s probably mutually inclusive. Knowing the proper way to fold a shirt is valuable, whether it’s for your closet or to merchandise your brick-and-mortar store. It keeps both drawers and shelves orderly and easily accessible.
Why You Should Fold Your Shirts
It’s visually easier on the eye. That mound of clothes that’s languishing in your chair? A problem. That may sound like parental nagging, but the research backs it up. We identify with our homes, and when our space is messy, cluttered and cramped, it can lead to a diminished state of well-being, difficulty processing thoughts and even poorer eating habits. This is where a good folding technique can help.
Unbeknownst to me, this method is very similar to Marie Kondo’s famous filing method of folding clothes. Step by step, it’s the same thing, except for two differences. The first is the use of a folding board. If you’ve ever wondered how retail stores get their clothes to look so neat, it’s because they’re using a folding board. A folding board not only helps guide where the garment should be folded, but also keeps every garment consistently sized. Without it, straightening and lining up stacks can be difficult. There are plenty of contraptions with various panels and hinges to help guide you through the folding process, but what most retail stores actually use is just a simple rigid rectangle. Often, it’s just a clipboard. But, you don’t even really need to buy a folding board or clipboard. A piece of cardboard cut into a 9-inch by 12-inch rectangle will work just fine.
While this method is nice if you like to see your clothes on a table or shelf, most of us likely keep our clothes in drawers if they’re not a hanger. That’s the second difference between this method and Kondo’s. Kondo goes one step further and folds her clothes an additional time so that the clothes can actually stand up. This allows the clothes to be filed into a drawer and be easily seen all at once without having to dig through stacks to find the right garment.