Grill The Perfect Burger This Memorial Day Weekend

The Master Butchers of Lobel’s School Us In The Art Of Meat

lobels-2
lobels

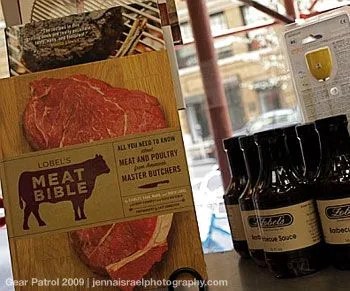
Hey, Truth just called. Apparently, you aren’t the grill master you think you are. No worries though, it shouldn’t be held it against you. But before you, myself, and the 60% of Americans who will fire up the grill this Memorial Day do so, take a few minutes to join me as I interview someone who does know his meat, Evan Lobel – coauthor of Lobel’s Meat Bible: All You Need to Know about Meat and Poultry from America’s Master Butchers. Yes, this man knows his meat.

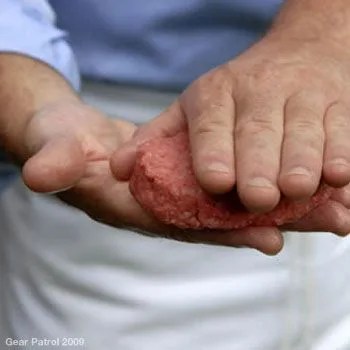
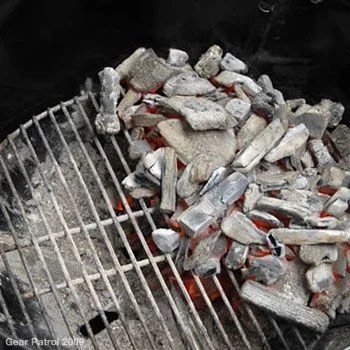
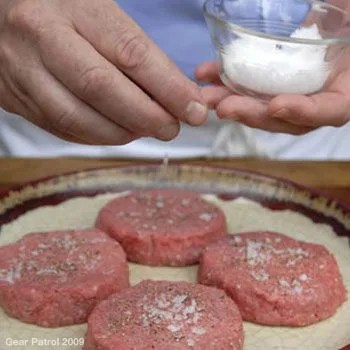
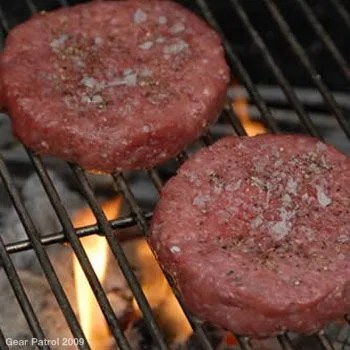
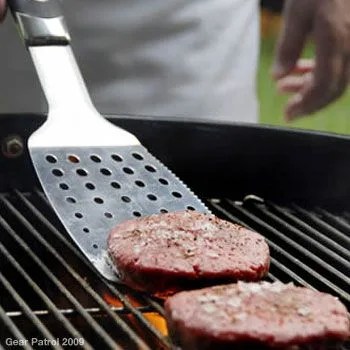
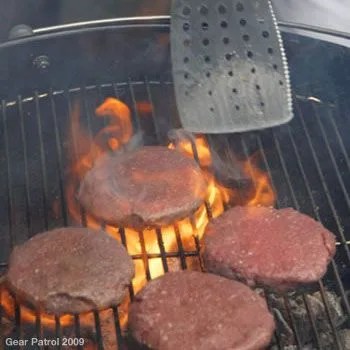
Lobel’s how-to and tips to grilling the perfect burger (both with direct and indirect heat) and more importantly, assure your ascent to Dr. Grillmeister fame.

all-you-need-to-know-about-meat-and-poultry

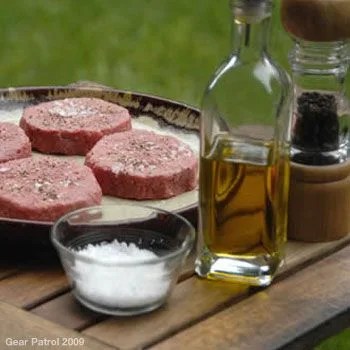
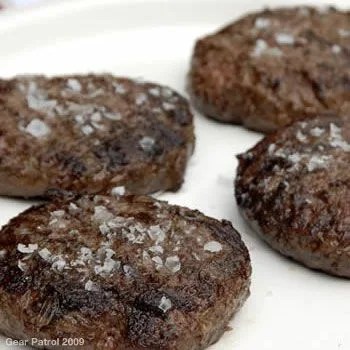
“We love beef, which puts us in good company. Most meat eaters favor it. Let’s face it – few things beat a plump burger sizzling on the grill…”

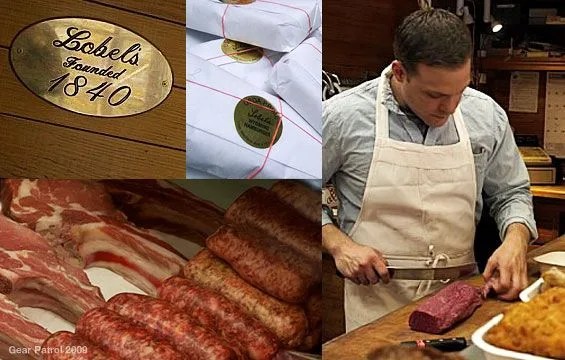
This excerpt opens the first chapter of Lobel’s Meat Bible: All You Need to Know about Meat and Poultry from America’s Master Butchers. It probably doesn’t take any convincing that this family of four couldn’t be anymore on target. And why should they? Lobel’s Butcher Shop dates back more than 170 years. As a result, America’s Master Butchers have cultivated a reputation as “the butchers to the stars.” Many Lobel’s customers have built a culinary reputation on their advice for preparing the perfect feast. This is Gear Patrol so we share the love, and we want to bring that to you.

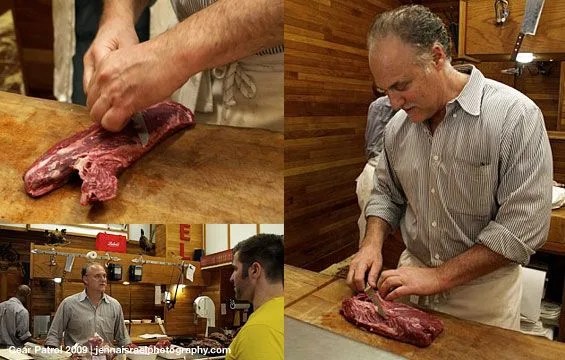
I recently popped into Lobel’s Madison Avenue storefront (or meat-locker) in the center of Manhattan’s Upper Eastside to pick Evan Lobel’s brain about all things man: meat and grilling. You may recognize Evan from several national radio and television shows, including the Food Network and the Martha Stewart show. Known as the “meticulous carver,” there are few more knowledgeable on selecting the right cut of meat and carving techniques that enhance flavor, texture and presentation. What really struck me after our 2 hour conversation about all things carnivorous is that this fifth generation butcher ended with one simple comment: “…but at the end of the day, there’s nothing better than grilling the perfect burger.” And with that, we raise our glass to you, Evan.

We love beef, which puts us in good company.

Before I share Evan’s wealth of knowledge on how to grill the perfect burger, do yourself a favor and pick up a few of their famous 1-pound Wyoming burgers. The meat alone will get you half-way there. As Ben (one of the few New Yorker’s lucky enough to have a fire based grill patio grill) will agree, you will never taste a more flavorful, tender, and rich burger in your life. Mark my word. Next to the Wagyu Beef based Gear Burger, Lobel’s USDA Prime Ground Beef (a special blend of prime ground chuck, sirloin and tenderloin) quite possibly makes the best burger meat I’ve ever had, though I fully understand each man swearing by his butcher. Lobel’s has attained maintained this level of superiority by dry aging the beef four to six weeks prior in a meticulously controlled 34-38 degree cooler.

lobels-2

Evan’s cousin, Mark, has shared with Gear Patrol readers three of his top secrets for the grilling process:

  1. If you’re not sure which ground beef to select, go with chuck. It has the most flavor and moisture. If you’re digging a juicy, yet healthier option, ask your local butcher to blend the chuck with sirloin.
  2. Ground beef should never come to room temperature – either in the store or at your mancave. The package should always feel cold, so pick the meat up last on your way towards the checkout line.
  3. Leave your beef alone. The more you mold and handle your beef, the tougher it becomes. And never, ever, ever ever ever, press down on a burger with your spatula – you’re squeezing the flavor out!

Well said. Now, on to the grilling methods (next page).

How To: Grilling the Perfect Burger (Indirect Method)

The Indirect Method is similar to roasting. Like a convection oven, heat will rise, deflect, and circulate, allowing your meat to be cooked evenly on all sides. Hence, there is no need to flip the food. This method is ideal for delicate or heavy foods that may require more than 25 minutes of grilling time, according to www.weber.com. What this means to you: if your burger is more than 1 inch thick (and it should, you are a man after all), use indirect heat.

The Steps:

forming-the-patty

1. Form The Patty: Take a lump of ground beef and, with cupped hands and a light touch, coax the meat into a ball. Place the ball in one hand – with palm flat. With your other hand – palm facing the opposite palm – gently press down on the ball, forming it into a disk.

Rotate the disk between your palms, pressing the side with your thumb to keep the disk round and the sides straight. Work the beef as little as possible to keep from compressing, which will make the burger tough.

chilled-burgers

2. Stack & Chill: Stack the burger patties on a platter in a single layer. Separate additional layers with parchment or wax paper, and refrigerate until ready to use.

indirect-heat-setup

3. Build Your Fire – Indirect Heat Method: For burgers 1-inch thick or more: Building your fire to one side of the fire bowl creates two temperature zones: one for searing over high direct heat (read: crunchy, carmelized crust) and one for bringing the burgers up to your desired degree of doneness using moderate indirect heat.

seasoning-the-burgers

4. Prepare: After removing them from the refrigerator, assemble the chilled patties with the olive oil, sea or kosher salt and pepper just before putting them on the grill.

setting-up

Brush with olive oil and sprinkle with fresh-cracked pepper and salt.

searing-with-direct-heat

5. Sear Roebuck & Co. Sear over direct heat for two to three minutes, depending on the thickness of your burger. Searing can be done with the grill lid on or off.

finishing-with-indirect-heat

6. Indirect Heat: After searing, move the burgers to the opposite side of the grill to cook indirectly until done (with the grill lid on for a smokier flavor.)

burgers-at-rest-after-grilling

7. And On the 7th, They Rest: After removing the burgers from the grill, allow them to rest three to four minutes. This allows the juices to redistribute within the meat for the juiciest burger you’ve ever tasted.

How To: Grilling the Perfect Burger (Direct Heat Method)

The Direct Method is the most popular method and replicates the functionality of a broiler. Simply put, food is cooked directly over the heat. Other than meat-Zeppelins, like the aforementioned one-pound hunk of Wyoming beef, most burgers (and food for that matter) you grill will be cooked using this method. Direct heat is responsible for giving meats a beautiful sear and grill marks. If you only take one thing away from this article, let it be this: Do not, I repeat, do not, continuously turn your meat. Food should be turned once halfway through the grilling time, forget what you learned at neighborhood bbq’s. Evan recommends cooking your burger over direct heat for 2 for 4 minutes per side, depending on the thickness of your burger. This will drastically improve the taste and texture of your burger.

The Steps:

forming-the-patty

1. Form The Patty: Take a lump of ground beef and, with cupped hands and a light touch, coax the meat into a ball. Place the ball in one hand – with palm flat. With your other hand – palm facing the opposite palm – gently press down on the ball, forming it into a disk.

Rotate the disk between your palms, pressing the side with your thumb to keep the disk round and the sides straight. Work the beef as little as possible to keep from compressing, which will make the burger tough.

chilled-burgers

2. Stack & Chill: Stack the burger patties on a platter in a single layer. Separate additional layers with parchment or wax paper, and refrigerate until ready to use.

direct-heat-setup

3. Build Your Fire – Direct Heat Method:For burgers up too ¾ inches: Building your fire in the center of the fire bowl creates a single temperature zone: HOT. This will help develop a crunchy, carmelized crust. The temperature will taper slightly toward the outer edges. Generally, however, when cooking to specific preferences, burgers over the center of the fire will be medium-rare, when burgers on the outer edges are rare. It takes a little choreography to get them all to come out the same degree of doneness.

seasoning-the-burgers

4. ‘Tis The Season To Prepare: After removing them from the refrigerator, assemble the chilled patties with the olive oil, sea or kosher salt and pepper just before putting them on the grill.

setting-up

Brush with olive oil and sprinkle with fresh-cracked pepper and salt.

searing-with-direct-heat1

6. Grill: Cook over direct heat for two to four minutes per side, depending on the thickness of your burger. Grill with the lid on for a smokier flavor.

burgers-at-rest-after-grilling1

7. Patience, Let Them Rest! After removing the burgers from the grill, allow them to rest three to four minutes. This allows the juices to redistribute within the meat for the juiciest burger you’ve ever tasted.

Finishing Touches

Pair your perfect burger alongside a wine (suggestion: 2006 Big House Red) and you’ve got one helluva good pairing to celebrate our fallen brothers this Memorial Day Weekend. Fire ’em up boys.

Photos by Jenna Israel Photography for Gear Patrol

,